FOLLOW MY FB

Wednesday, October 31, 2012

Ice Cream Cone Cupcakes

Here’s a snappy idea which will lend a little whimsy to the next birthday party you throw for your child. Bake some cupcakes in ready-made ice cream cones. You can complete them ahead, and have the cupcakes ready for serving. Or you can bake and cool them in advance, leaving frosting and the decorating as an activity for that house full of energetic kids you're expecting.


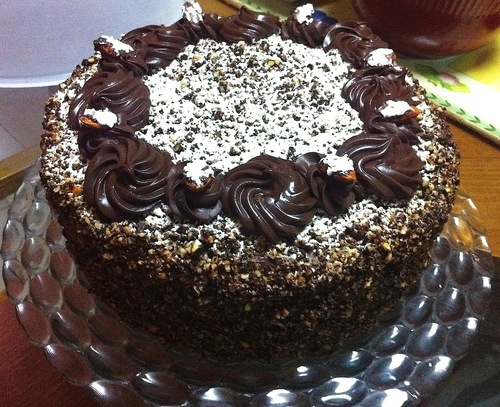
wanna try to make a vogue cupcakes like these??? 

just take a very simple step...

u can watch it here


and here


Ingredients
  • Store-bought or homemade cake batter of choice
  • Ice cream cones
  • Frosting of choice
  • Sprinkles
Steps :

1. Make the batter for the cupcakes. Use a cake mix or your favorite scratch cake recipe. Prepare the batter as per directions.

2. Unwrap the ice cream cones slowly, being careful not to damage them as you remove any plastic coverings. Place each empty cone in a muffin tin, one per ungreased muffin cup

3. Pick up and fill each cone. Replace each cone in its muffin cup.

*** Leave a little room at the top for expansion (about 1/2 to 3/4 inch).
*** Do not overfill the ice cream cones with batter. An ice cream scoop holds about the right amount and lets you do a neat and trim job of filling. Aim for cupcakes which do not overflow the cones. These will be more attractive and will be easier to frost. The image of batter in the cone here will result in an unsightly overflow during baking:

4. Bake according to cake batter instructions. Bake for the same length of time you would bake regular cupcakes
5. Prepare the icing or open up a store-bought icing mixture.

6. Place the sprinkles in a small bowl.

7. Remove the cupcakes from the oven and allow them to cool.

8. Frost the cupcakes using a knife or spatula. Try to let the frosting warm up a bit if you've been keeping it in the fridge, as some frostings are more difficult to work with when cold.


9. Dip the top of the cupcake in sprinkles. Dip fully or dip just one side for an artsy effect

10. Place each cupcake back into the muffin tin, or place in a serving dish with sides. Carry the muffin tin or serving dish very carefully; these cupcakes will be top heavy and have a tendency to topple

11. Serve and enjoy! :-)

Tuesday, October 30, 2012

Tips for Getting the Most Out of Your Cupcakes


Baking cupcakes isn’t necessarily difficult to do, however things can sometimes go unexpectedly wrong eg. they don’t rise well; they stick to the liners or pan, etc). However there are ways you can ensure you get the best cupcakes possible without having to do much extra work and the simple tips below will have you making mouth-watering cupcakes that leave everyone wanting more. And wanting to know your secret!

When trying out a new cupcake recipe, you might consider cooking a ‘trial’ cupcake in the oven first. Why? Because every recipe is different and not all batter will rise the same. Simply fill one cupcake liner halfway and see how much it rises. Then you’ll know if you need to keep it halfway full, lessen the amount, or increase the amount.

For those who don’t have time to look for a new recipe or simply have a cake recipe they really enjoy, you can use a cake recipe in place of a cupcake one. The only difference is that you use a cupcake pan in place of a cake pan. Also keep in mind you probably won’t have to bake them as long when divided into cupcakes.

Filling a cupcake pan can be rather messy. If you haven’t already discovered a cleaner way to fill them, consider using an ice cream scoop. If this doesn’t work, consider using a small funnel and simply place your thumb or finger over the end of the funnel until you’re ready to fill.

 A marvelous cupcake can be ruined simply from not being stored properly. That said, if your cupcake contains certain frostings, they need to be refrigerated. Such frostings include whipped cream, ganache, cream cheese, and butter cream, to name a few. Otherwise, storing your cupcakes in an airtight container will work out just fine.

 Always use cupcake liners when baking cupcakes. These not only make them easier to remove it makes them taste better. You also aren’t left with a messy pan if they decided to stick to the pan when you take them out.

 A majority of us fall in love with really moist cupcakes. Unfortunately they don’t always emerge from the oven this way. Here are some tips to help you achieve moist cupcakes. Enjoy!

  • Make sure your batter is light rather than really heavy.
 • Do not excessively beat or stir the batter.
 • Add a little extra liquid.
 • Opt for oil in place of butter.

Top Seller Book Of Cake Decorating


Wednesday, October 17, 2012

Black and White Cookies Recipe


For the cookies: 
1 cup all-purpose flour 
1 cup cake flour 
1 tsp. baking powder 
1/4 tsp. table salt 
6 Tbs. whole or low-fat milk 
1 tsp. vanilla extract 
Grated zest of 1/2 lemon, preferably organic 
1/2 cup (4 oz.) unsalted butter, at room temperature 
2/3 cup granulated sugar 
2 large eggs, at room temperature 
For the icings:
2 cups plus 2 Tbs. powdered sugar, or more if needed 
4 tsp. light corn syrup 
1/2 tsp. freshly squeezed lemon juice 
1 tsp. vanilla extract 
3 Tbs. unsweetened Dutch-process cocoa powder 


To make the cookies:
Position racks in the upper and lower thirds of the oven; preheat the oven to 375°F. Line two baking sheets with parchment paper or silicone baking mats.
In a small bowl, whisk together the all-purpose and cake flours, baking powder, and salt. In another small bowl, mix together the milk, 1 teaspoon vanilla, and lemon zest.
In a stand mixer fitted with the paddle attachment (or in a bowl by hand), beat together the butter and granulated sugar on medium speed until completely smooth. Beat in the eggs one at a time. Stir in half of the flour mixture, followed by the milk mixture, then stir in the remaining flour mixture and beat until the batter is smooth.
Drop 2 Tbs. batter in mounds spaced 2 inches apart on the prepared baking sheets. Bake, rotating the baking sheets midway through baking, until the cookies feel just set in the centers, about 15 minutes. Let cool completely on the baking sheets.

To make the icings:
In a medium bowl, whisk together the 2 cups confectioners' sugar with 2 tsp. of the corn syrup, the lemon juice, the vanilla, and 3 Tbs. water until smooth.
Transfer half of the mixture to a small bowl and whisk in the cocoa and remaining 2 tsp. corn syrup to make the "black" icing. Add up to 2 teaspoons more water, if necessary, to make the icing spreadable; it should not be too thin, so begin by adding 1 teaspoon and add another teaspoon only if needed. Whisk the remaining 2 Tbs. confectioners' sugar into the white icing. The two icings should have the same consistency: thick, but spreadable. (If the white icing is too thin, add a bit more confectioners' sugar.)
With a small icing spatula or a butter knife, spread white icing over one half of the flat (bottom) side of each cookie. Spread black icing over the other half. Let the icing set for a few minutes before serving.

Tuesday, October 16, 2012

Keikos Cake And Pastry Friends


Keikos-cake.com is the place where pastry chef Keiko shares her recipes. She’s a professional confectioner and pastry teacher.
The philosphy of keikos-cake.com is to provide delicious, first class recipes in a way that enables “normal” people, hobby bakers, and everyone interested in good food to make these cakes and desserts, as well. All recipes are presented with videos and step-by-step instructions in downloadable pdf files.
The feedback proves that this concept really works.
People all over the world impress their friends and family with Keiko’s masterful cakes and desserts.


Click Here! for more details about keiko :-)

Extraordinary Cakes: Recipes for Bold and Sophisticated Dessert


How to make cakes that are as delicious to eat as they are beautiful to behold. Karen Krasne, the “Queen of Cakes” according to Gourmet magazine, brings a fresh and contemporary sensibility to special-occasion cakes. Instead of the conventional fondant and gum paste, she relies on natural frostings based on chocolate, cream, or butter (which are also easier to make). What makes these cakes showstoppers is their unexpected flavor combinations-take, for example, the Blood Orange Ricotta Torte, the Chocolate Tiramisu, or the Yuzu Tea Cake. These desserts take full advantage of layering-contrasting textures in each bite-as seen in the New York, New York (chocolate ganache, devil’s food cake, chocolate chantilly, and caramelized apples) or the Beau Soleil (mascarpone mousse, peaches, pralines, and honey-soaked pound cake). Krasne favors vibrant touches like fresh fruit and real flowers, which add flair without being fussy. The recipes include tips from her twenty years as a pastry chef, and a step-by-step introduction covers basic techniques. Extraordinary Cakes shows how to create amazing cakes that satisfy sophisticated palates-but are still achievable for the home baker.

Some of the luscious cakes included are 

  1. Toasted Macadamia Caramel Cheesecake
  2. Shangrila (Guava Mousse, White Chocolate Mousse, Fresh Strawberries, Pound Cake)
  3. Vallarta (Key Lime Cream, Whipped Cream, Tequla-Infused Genoise)
  4. Marco Polo (Vanilla Mousse, Blackberry Gelee, Tea-Infused Cake)
  5. Chocolate Nirvana (Chocolate Mousse, Chocolate Cream, Chocolate Cake)
  6. King Kamehameha (Coffee Mousse, Chocolate, Mocha Pralines, Chocolate Cake)
  7. Beau Soleil (Marscapone Mousse, Peaches, Caramelized Pralines, Honey, Pound Cake)
  8. Blood Orange Ricotta Torte
  9. Carnaval (White Chocolate Banana Truffle, Chocolate Mousse, Rum)
  10. Caribe (Banana, Mango, Passion Fruit, Chocolate Cake)
  11. Tortamisu (Marscapone Cream, Espresso-and-Rum-Soaked Cake)
Extraordinary Cakes: Recipes for Bold and Sophisticated Desserts

1,000 Ideas for Decorating Cupcakes, Cookies & Cakes

A sugar-coated feast for the eyes and the imagination—this exciting 1,000 collection presents glorious full-color photographs of beautiful, outrageous, and deliciously decorated desserts, from extravagant wedding and birthday cakes to cupcakes and cookies that are miniature works of art. Like all of the books in our 1,000 series, this is not an instructional book, rather, it is a visual showcase designed to provide endless inspiration for anyone who loves decorative baking and entertaining.


1,000 Ideas for Decorating Cupcakes, Cookies & Cakes (1000 Series)

How To Make A Cake Pops

Watch this video :-)

What's cuter than a cupcake? A cake pop, of course! Wildly popular blogger Bakerella (aka Angie Dudley) has turned cake pops into an international sensation! Cute little cakes on a stick from decorated balls to more ambitious shapes such as baby chicks, ice cream cones, and even cupcakes these adorable creations are the perfect alternative to cake at any party or get-together. Martha Stewart loved the cupcake pops so much she had Bakerella appear on her show to demonstrate making them. Now Angie makes it easy and fun to recreate these amazing treats right at home with clear step-by-step instructions and photos of more than 40 featured projects, as well as clever tips for presentation, decorating, dipping, coloring and melting chocolate, and much more.
Cake Pops: Tips, Tricks, and Recipes for More Than 40 Irresistible Mini Treats

Wednesday, October 10, 2012

Basic Recipe For Preparing A Cupcakes

Everyone needs a good basic cupcake recipe to create the perfect cupcakes. These plain cupcakes can be decorated with our perfect cupcake buttercream to create beautiful cupcakes perfect for any occasion.


As request on our fanpage, here are the recipe

Ingredients


  • 250g (8oz) unsalted butter, softened
  • 250g (8oz) caster sugar
  • 250g (8oz) self-raising flour
  • Pinch of salt
  • 4 medium eggs
  • 4 tablespoons milk
  • Ice-cream scoop (optional)
  • 2 x 12-hole muffin tins, lined with paper cases
Method


  1. Set the oven to 190°C or Gas Mark 5. 
  2. Tip the butter into a bowl and beat it until softened. Add the sugar, flour, salt, eggs and milk and whisk until the mixture is smooth. 
  3. Use a traditional-style ice-cream scoop, or spoon, to divide the mixture between all the paper cases.
  4. Place both muffin tins in the oven and bake for 15 minutes, then swap over the position of the tins over and bake for a further 3-7 minutes, until both trays of cupcakes are a light golden colour. 
  5. Remove the tins from the oven. Leave the cupcakes to cool in the tins for a few minutes, then transfer them to a wire rack to cool.

Freezing: The cakes are best eaten on the day that they're baked, but if necessary, once cold, they can be wrapped in freezer bags and frozen for up to 1 month. They will defrost in about 1hour. They can be decorated with the buttercream topping while they are still frozen, which will help to keep them as fresh as possible before serving.

Flavour variations
: If you don't want plain cupcakes, then try one of these flavours:

  • Lemon: Add finely zested rind of 2 lemons to the mixture, and use 4 tablespoons of lemon juice in place of the milk
  • Chocolate: Use 2 level tablespoons less flour, and add 2 level tablespoons cocoa
  • Rose: Use 1-2 tablespoon less milk and replace with 1-2 tablespoons rose water
  • Coffee: Omit the milk and, in its place, use 2 tablespoons instant coffee, dissolved in 4 tablespoons hot water
  • Now watch our video recipe for the perfect buttercream to go on top!

Saturday, October 6, 2012

Summer Berries and Cream Cake


Time: 1 hour 30 minutes
For the cake:
Vegetable oil or nonstick vegetable oil spray
4 large eggs
1 cup sugar
1 teaspoon vanilla extract
Finely grated zest of 1 lemon
1 cup flour

For the sauce:
2 cups strawberries, hulled
2 tablespoons confectioners' sugar
1 tablespoon lemon juice

For the filling and topping:
¾ cup blueberries
¾ cup blackberries
¾ cup red raspberries
½ cup red currants or golden raspberries
2 cups heavy cream
1 teaspoon vanilla extract
1 cup strawberries, hulled
½ teaspoon confectioners' sugar.

1. To prepare cake, first heat oven to 350 degrees. Oil or spray a 10-inch springform pan, and line bottom with parchment paper.

2. Using an electric mixer at high speed, whisk eggs and sugar together until they triple in volume, becoming thick and airy. Add vanilla and lemon zest, and whisk to combine. Reduce speed to medium-low, and gradually add flour. Remove bowl from mixer, give a final fold with a spatula and pour into prepared cake pan. Bake until risen and light golden brown, 25 to 30 minutes. Cool pan on wire rack 10 minutes, and remove sides from pan.
3. When cake is cool use a long, thin knife to split it into 2 thin disks. Place bottom half cut side up on a serving platter; place other half cut side up on a large piece of foil. In a blender, combine 2 cups strawberries, confectioners' sugar and lemon juice. Purรฉe until smooth. Set aside ¼ cup purรฉe, and divide remaining purรฉe between two cake layers, pouring over cut sides and spreading with a rubber spatula.
4. In a large bowl, combine reserved ¼ cup purรฉe with ½ cup blueberries, ½ cup blackberries, ½ cup red raspberries and currants or golden raspberries. Fold gently to mix.
5. Whisk heavy cream with vanilla until thick but still soft. Spread half over cake sitting on serving dish. Top with fruit mixture, and place remaining cake half on top, cut side down. Spread remaining cream on top. Cut strawberries into halves or quarters, and place in a bowl. Add remaining ¼ cup each of blueberries, blackberries and raspberries, and toss to mix. Arrange berry mixture on top of cake, and dust with confectioners' sugar.


Strawberry and Chocolate Baked Alaska

Ingredients

  • 6 ounces bittersweet or semisweet chocolate, chopped
  • 6 tablespoons (3/4 stick) unsalted butter
  • 3/4 ounce unsweetened chocolate, chopped
  • 1 1/2 cups sugar, divided
  • 2 large eggs
  • 1/3 cup all purpose flour
  • 2 tablespoons unsweetened cocoa powder
  • 1/2 teaspoon baking powder
  • 1/8 teaspoon salt

  • 1 pint strawberry ice cream, slightly softened

  • 3 large egg whites

Preparation

Preheat oven to 350°F. Butter 9x9x2-inch metal baking pan; line bottom with parchment paper. Stir bittersweet chocolate, butter, and unsweetened chocolate in small saucepan over low heat until chocolates melt and mixture is smooth. Cool 10 minutes. Whisk 3/4 cup sugar and eggs in large bowl until well blended, about 1 minute. Whisk in chocolate mixture. Sift flour, cocoa, baking powder, and salt over; stir to blend. Transfer batter to prepared pan. Bake cake until top looks dry and tester inserted into center comes out with some thick sticky batter attached, about 17 minutes. Cool cake in pan to room temperature.


Cut around cake in pan. Place cutting board over pan and invert, tapping out cake. Peel off parchment. Using 3-inch round cutter, cut out 6 cake rounds (save remaining cake for another use). Line small baking sheet with parchment paper. Arrange cake rounds on prepared sheet. Using 2 1/4- to 2 1/2-inch-diameter ice cream scoop, place scoop of strawberry ice cream in center of each round, leaving about 1/4-inch plain border. Freeze until ice cream is solid, about 2 hours.
Combine remaining 3/4 cup sugar and egg whites in large metal bowl. Set bowl over saucepan of gently simmering water and whisk until mixture is very warm, about 2 minutes. Remove bowl from over water. Using electric mixer, beat meringue at high speed until very thick and billowy, about 2 minutes. Place baking sheet with cake rounds on work surface. Mound 2 heaping tablespoons meringue atop ice cream on 1 cake round. Spread meringue evenly over to cover, sealing meringue to plain cake border and swirling decoratively. Repeat with remaining desserts. Freeze uncovered on baking sheet until meringue is solid, at least 2 hours and up to 2 days.
Preheat oven to 500°F. Transfer desserts still on baking sheet from freezer directly to oven. Bake until meringue is deep brown in spots, turning sheet as needed for even cooking, about 3 minutes. Transfer to plates.


Read More http://www.epicurious.com/recipes/food/views/Strawberry-and-Chocolate-Baked-Alaska-235561#ixzz28aOJOn00

Butterscotch Banana Cake With Caramel Cream Cheese Frosting

Butterscotch Banana Cake With Caramel Cream Cheese Frosting

Having all of the ingredients ready when starting the butterscotch sauce before you begin is very important, as it is a fairly fast process, and the sauce won’t wait for you to dig around for the ingredients.
Butterscotch banana cake is split into three layers and frosted with caramel cream cheese frosting. It is garnished with toasted almond slices and banana chips. This banana quickbread is special because chunks of bananas are cooked in caramel and butter until they turn to mush. This step really pumps up the flavour for the cake. The frosting is a twist on classic cream cheese frosting made with a thick salty caramel sauce.

ingredients:

banana cake ingredients

  • 2 c (220g) chopped Pecans
  • 3 c (410g) Cake Flour
  • 1 T (15 g) Baking Powder
  • 1 1/2 t (8g) Sea Salt
  • 1 c (227 g or 2 sticks) unsalted Butter, room temp but not too warm
  • 3 c (600g) Sugar
  • 4 Egg Yolks
  • 2 whole Eggs
  • 1/2 c (120ml) Canola Oil
  • 8 ripe Bananas (approx. 4 c smashed)
  • + 3 additional Bananas for final assembly, sliced length-wise
  • + 3 T unsalted Butter for cooking bananas for final assembly

butterscotch sauce ingredients

  • 4 T (60 g) unsalted Butter
  • 1 c (200 g) Golden Brown Sugar, tightly packed
  • 1/2 c (120 ml) Heavy Whipping Cream
  • 1 t (5 ml) Vanilla Extract
  • 1 1/2 T (22 ml) Scotch
  • Sea Salt to taste (@ 1 t (5 g))

cream cheese frosting ingredients

  • 1/2 c (115 g) unsalted Butter, room temp.
  • 2  - 8oz pkgs  (455g total) Cream Cheese, room temp.
  • 1 t (5 ml) Vanilla Extract
  • 4 c (455 g) Confectioners Sugar
  • few dashes Orange Bitters (optional)

directions:

banana cake directions

Preheat oven to 350ยบ F. If you have a baking stone, place that in the center rack to bake on. Butter two 8" cake pans, line bottoms with parchment paper, butter parchment, then dust with flour and tap out excess.
  1. Spread pecans in a sheet pan and bake in oven for 10 minutes or until gently toasted. Remove from oven and set aside to cool.
  2. In a mixer, combine cake flour, baking powder, and sea salt and mix on low for 30 seconds. Set aside. Do not clean bowl.
  3. In mixer, beat butter on medium speed until light and fluffy - at least 4 minutes *see note 1. Add in sugar and beat on medium speed until light and fluffy.
  4. On low speed, beat in egg yolks and whole eggs one at a time until just blended. On low speed, beat in canola oil.
  5. On the lowest speed, stir in flour mix until just blended.
  6. Mash bananas well, then mix bananas and pecans into batter.
  7. Divide batter between the two 8" pans, place on a sheet pan and put in the oven, or if using a baking stone , slide directly onto the baking stone in the oven.
  8. Bake for 45 minutes - 1 hour or until a toothpick comes out clean when inserted into the middle of each of the pans. The kitchen will noticeably smell of the banana cake as it nears completion. Set aside to cool completely before frosting.

butterscotch sauce directions

  1. In a heavy saucepan, melt the butter over low-medium heat. Just before butter is completely melted, add the brown sugar, stirring to completely moisten the sugar.
  2. Gently cook, stirring occasionally, until the mixture caramelizes and transforms from its initial graininess to a smooth “molten lava”.  Make sure to get the corners of the pot and watch closely because the texture will change quickly, 3-5 min.
  3. Whisk in all of the cream at once, lower the heat a little, and continue whisking until the the liquid is homogenous. Turn heat back up to medium and cook for another 7 minutes, whisking every few minutes.
  4. Turn off the heat and let cool for 15 minutes. Add half of vanilla extract, Scotch, and sea salt, then taste for flavor.  Add more of each until the flavor is perfect to your palate. Pour into a sealable container and allow to cool fully. Store covered and refrigerated for up to a month.

cream cheese frosting directions

  1. In a mixer, beat the butter until light and fluffy. Add cream cheese and beat until light and fluffy.
  2. Stir in confectioners sugar, vanilla extract, and bitters then slowly increase speed and beat until incorporated. Set aside until ready to frost cake.

banana cake assembly

  1. In a large skillet heat additional 3 T of butter over medium heat. Add sliced bananas and cook until slices start to brown, 1-2 minutes. Carefully turn over bananas and cook other side until browned, 1-2 minutes.
  2. If butterscotch has thickened too much to pour, gently heat until it becomes pourable. Set aside.
  3. Remove banana cakes from pans, peel off parchment, and trim the tops with a serrated knife to give them flat top surface.
  4. Put a dab of frosting in the middle of a cake circle or plate (the frosting helps keep the cake from sliding around). Place the first cake layer on a cake circle or plate. Line several strips of wax paper around base of cake to help keep circle or plate clean.
  5. Put about 3/4 cup of frosting in the middle of the cake and spread the frosting working from the center out, leaving a slight built up edge on the outer rim. When finished, you should have nice thin layer of frosting over most of the top surface of the cake, with a 1/2" little wall on the outer rim that will help hold in the butterscotch.
  6. Arrange browned banana slices on bottom layer of cake, keeping within the frosting rim. Pour butterscotch over banana slices (you'll only use about half of the butterscotch).
  7. Take second cake and frost a thin layer  on the cut top to seal crumb and keep butterscotch from soaking into cake. Carefully turn over cake and set on top of bananas, frosted side down.
  8. Spread frosting over entire cake, swirling to completely cover. Remove strips of wax paper at base of cakes. Serve immediately or refrigerate for up to 3 days. Bring to room temperature before serving if possible.
* Note 1: The ideal temperature for butter to be creamed is 65 degrees. When creaming butter, you don't want it to get too warm. If the butter actually melts during creaming (the beating generates heat) it can result in a very heavy cake. The bowl should always feel slightly cool to the touch. If it starts to feel warm. Pause the mixing, put bowl in an ice bath or freezer for 5 minutes, then resume.


for more result click here
http://whiteonricecouple.com/recipes/banana-cake/
and

Lets Join

Please Leave Your Comment